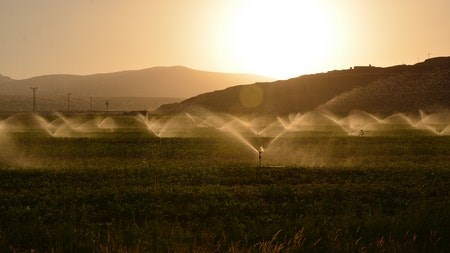
Installing your own irrigation system offers several advantages over employing a professional to do the job.
First of all, as every DIY enthusiast knows, there is the satisfaction of doing it yourself.
The second is the cost. Even if you buy a complete system and install it, you will save on labour.
Third, if the system breaks down for some reason, you will almost certainly be able to find the problem and fix it yourself. After all, you know where every pipe has been laid and the types of sprinklers and jets you have installed.
The materials required will depend on the size of the system you are installing. Bigger systems will require more piping, sprinklers and jets than smaller systems. The cost of the system installed can range from around R100 to a couple of thousand or more, depending on the size.
DIY
There are two options for doing the installation yourself: You can buy a complete DIY irrigation set that closely meets your requirements, or you can design the system and then get the pieces needed.
Minimise the joints and sharp bends in your system. The more the water can flow through the main supply pipe and the tubes to the micro-jets without impediment and ‘drag’, the more efficient the system will be.
If you use a well-point or a borehole, remember that the pump will be rated to a particular power. This will affect the amount – and pressure – of the water being supplied to the system, so selecting the number of pop-ups and micro jets needed as well as nozzle sizes is primarily a case of trial and error.
Sample project
The following project was carried out by Mica’s DIY experts (https://www.mica.co.za/setting-irrigation-system/). It serves as a guide to the type and number of components you might consider for your own project.
This installation required a simple system that could water the garden beds, and the lawn without wetting the paving. In addition, a birdbath needed to be topped up and small plants in a rockery were also watered.
The cost of the project’s materials was just over R1 000.
40m of 20mm irrigation pipe
Three pop-up sprinklers
Three T-pieces
One end-plug
A selection of micro-jets - spinners, 90° and 180° - supports and 4mm tubing as well as connectors for connecting the micro-jets to the main pipe.
4ℓ/hour drip feeders to top up the birdbath and water plants in the rockery. These are also available in 8ℓ/hour units.
A 1m length of 75mm diameter pipe was cut into 200mm sections to protect the pop-ups from damage from edge trimmers and mowers. These were positioned over each pop-up with soil packed around them to keep them in place. They also help prevent soil and plant debris from getting too close to the pop-ups and causing possible blockages.
Tips
The main pipe was buried about 250 mm below the soil surface to make the system as unobtrusive as possible. Thus, the only visible pipes are those feeding the micro-jets on their risers and the end of the pipe where it rises to be connected with the timer.
When the pop-ups operate, they only seal when fully extended, so there can be quite a bit of water shooting up initially until they are fully extended. At that stage, the units seal themselves, and all the water is directed out through the nozzles.
Each pop-up is supplied with a range of nozzles of various sizes, and depending on the ‘throw’ required and pressure available, you will be able to select the best option for a particular pop-up. The rotating head has an adjustment screw, rotated counter-clockwise for reduced rotation and clockwise for increased rotation. When adjusting the arc, make minimal adjustments, test after each adjustment and adjust again – gently – until the desired rotation arc is achieved.
When connecting micro-jets, allow a bit more tubing than the bare minimum. It will cost slightly more, but you will be able to move the micro-jet about a bit, perhaps to give better coverage to a particularly thirsty plant.
Maintenance
Make it a point to regularly check, clean, and replace the micro-jets and pop-up filters if necessary. If one or more is blocked or the flow to a pop-up nozzle is impeded, the pressure in the rest of the system will increase. This could cause one or more micro-jets to pop out.
There is a filter at the base of the head unit, and it is a good idea to remove it and clean it periodically. After cleaning the filter, apply a little pressure from your thumb, and the filter will clip back into place.
For the finishing touch, a battery-powered timer can be programmed to match your specific watering needs.