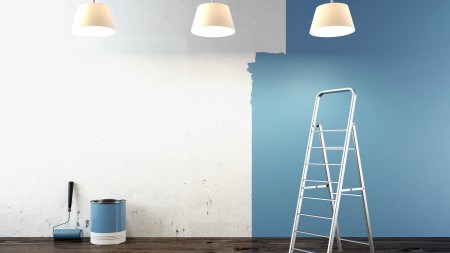
When it comes to simple décor fixes or sprucing up your home, a fresh coat of paint is probably one of the quickest and cheapest ways to do so with minimal effort.
A new paint job can do so much to enhance your home. A change in colour can completely change the mood or tone of a room while a bold colour can make a proud and loud fashion statement – a lot of bang for a not too much buck! That said, many people can often be faced with a sense of trepidation about what to do if something goes wrong, especially given the seemingly permanent nature of paint! If this sounds like you fear not! We have the solutions to some of the most typical painting mistakes out there!
The paint has blistered or bubbled
Perhaps one of the most common results of a painting mistake is the formation of paint blisters or bubbles. Paint will begin to blister or bubble when there isn’t enough adhesion between the film of the paint and the surface beneath it. This lack of adhesion is often caused by too much moisture or heat in the air which, in turn, causes the paint film to lift off and away from the wall surface it is trying to bond with. The result is a blister or bubble which will ultimately lead to the paint peeling off the walls. While this common painting problem isn’t too hectic to fix, its presence is often unfortunately indicative of water damage or dampness that’s managed to creep into the walls themselves so be sure to rule this out as a cause before attempting to fix the bubbles and start again.
Once you know that moisture isn’t coming from the walls themselves, use a sander or paint scraper to sand and scrape the bubbles down until they appear removed. Once the wall surface is smooth again, apply a fresh coat of paint primer before starting to repaint. If the blistering or bubbling paint wasn’t caused by moisture in the walls and was perhaps caused by the excessive heat of a Summer’s day, be sure to clean and dry the walls after removing the bubbles and before applying a primer and sealant over the marks. Allow the surface of the walls to dry completely before starting to repaint. If need be, bring in a dehumidifier to assist with the drying process.
The paint has started cracking or flaking
When it comes to the problem of paint starting to crack, attending to it sooner rather than later is the best response to have in that instance. Cracks or flaking paint will worsen if left unattended and is often due to incorrect or poor surface preparation prior to painting. It can also be caused by trying to paint oil-based paint over latex paint. Similarly, cheap paint will also tend to crack or flake given its poor consistency. In some instances, extreme cracking could be caused if you apply a second or third layer of paint to a layer beneath that hasn’t dried properly or sufficiently.
Fixing cracking or flaking paint is relatively easy. Simply take a wire brush or paint scraper and slowly start to remove and lift off any loose surface paint. Once the surface flakes have been removed, sand the surface of the wall down and paint with the primer before attempting to repaint. If your wall has quite a few layers of flaking paint, be sure to fill in any holes with Polyfilla before sanding down and proceeding as normal.
The paint is spread too thin
Another common painting mistake one can make is accidentally spreading the paint way too thinly over the wall surface you are trying to paint. Nothing dilutes or negates the impact that pop of colour can make to a room than a thin or diluted coat of paint. The result is a streaky and washed-out finish (not in the good sense!) which often doesn’t do much justice to the rest of your décor. When painting a wall, be sure that your brush is evenly coated but not soaked in paint before applying it.
If you have unwittingly done a thin paint job on a wall or two, simply pre-wash the walls with a soft sponge and liquid detergent before applying a further coat or two to the affected areas. This helps prevent there from being a noticeable difference between what area wasn’t painted too thin and what area was painted over.
While mistakes do happen, painting is a relatively inexpensive and safe option for those wanting to try to give a room or home a breath of fresh air and inspiration. To avoid any mistakes upfront, remember to take the time to do all the required prep work prior to painting as this really does pay off in the end. That said, if painting mistakes are made, you can rest assured that they can often easily be amended with a bit of savvy and some good ol’ fashioned elbow grease!